Crystal's World

Welcome to my world! This is where you can see my crafty projects and probably learn a little about me and my projects!

Friday, March 31, 2006

The Felting Study Continues!

Here we have another study in felting. This is almost purely for comparison with the other wools I've tried. Here we have the pre-felted black bag done with two strands of Lamb's Pride Bulky on the Yellow Loom. It's sittting with the bags I previously made. This was done with the same pattern as the other bags with the flat bottom method - starting with 18 pegs, knitting til it reaches the other side, then knitting in the round. I did the handles and buttonhole cords on the loom with just 1 strand . I used just 2 pegs and knitted in a figure 8 pattern. For the buttonhole strap, I folded the piece in half and stitched along the edge leaving an open loop in the end for a button. I can't wait to see how it compares to the other bags in size once it's felted!
Remember to click on the image for a larger view - it's hard to see it in black and small!

Big Tote Part 2

The After Shot!
If you recall, the big pillow in the background was in the bag in the pre-felted pic, along with it's mate! Now, the tote is still big... it measures 9 1/2" high with a base of 13" x 5". The pre-felted size was 15" tall with a base of 18" by 6".
This was made with 2 strands of Lite Lopi yarn. This was the messiest felting of any of the yarns I've tried so far. More little wool balls floating in the washer than I had seen before. (I have felted a bag comparable in size that I knitted with needles - it was made with Lamb's pride bulky. That was messy too--- but not nearly as much as this one!) After it was done felting, I rinsed it in the sink with warm water. Then, I put it back into the washer through the rinse and spin cycle- hoping to tone down the fuzzies a bit. It was still very hairy! Those little guys were sticking straight out - some as much as a couple of inches! So, I decided to put it in the dryer- still in the mesh bag. I was hoping this would help to buff them down a bit. It worked! The bag is definitely less fuzzy as a result!
I got this idea from my mom... she was telling me about a show she saw on HGTV where the woman 'buffed' the felted hat with a piece of regular vinyl in place of sandpaper on an electric sander. Now, this woman did raw wool felting from what I understand (didn't see the show myself) So, the process was completely different... but that's where I got the buffing idea!
So there you have it... I think this will be a great project bag... and boy do I have projects!
:-)

Tuesday, March 28, 2006

The Big Tote!

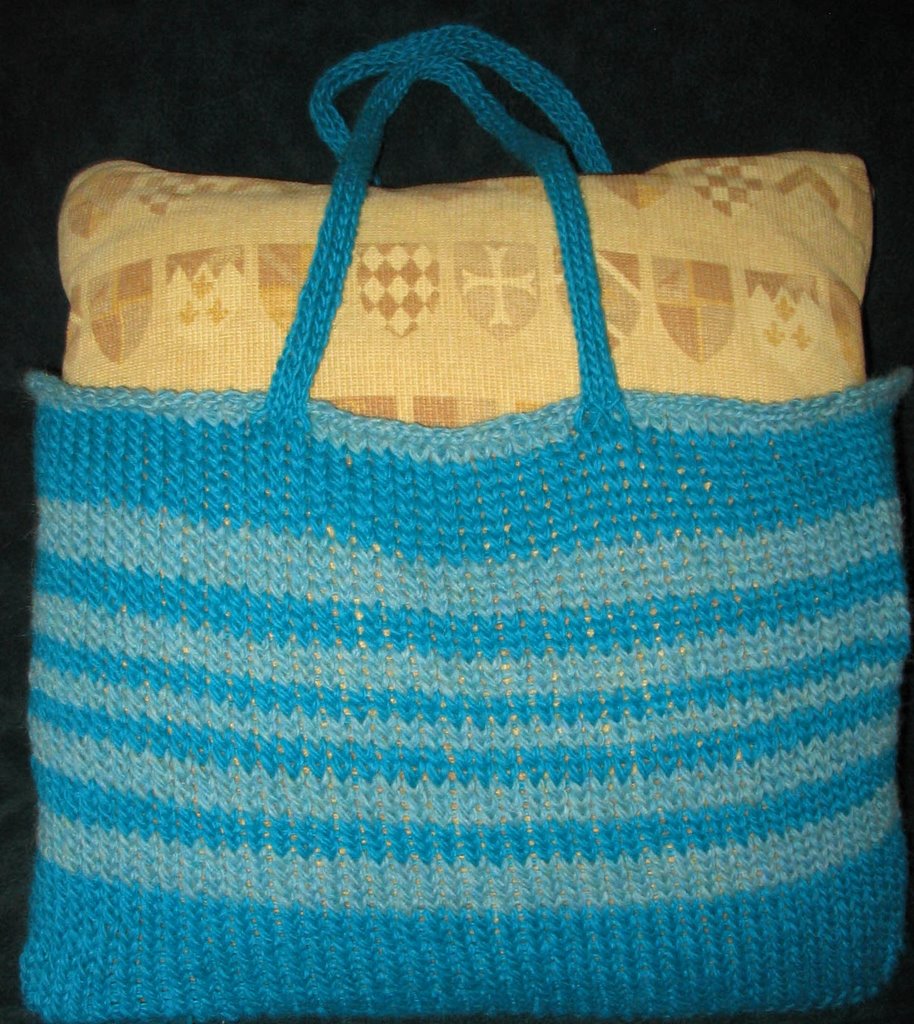
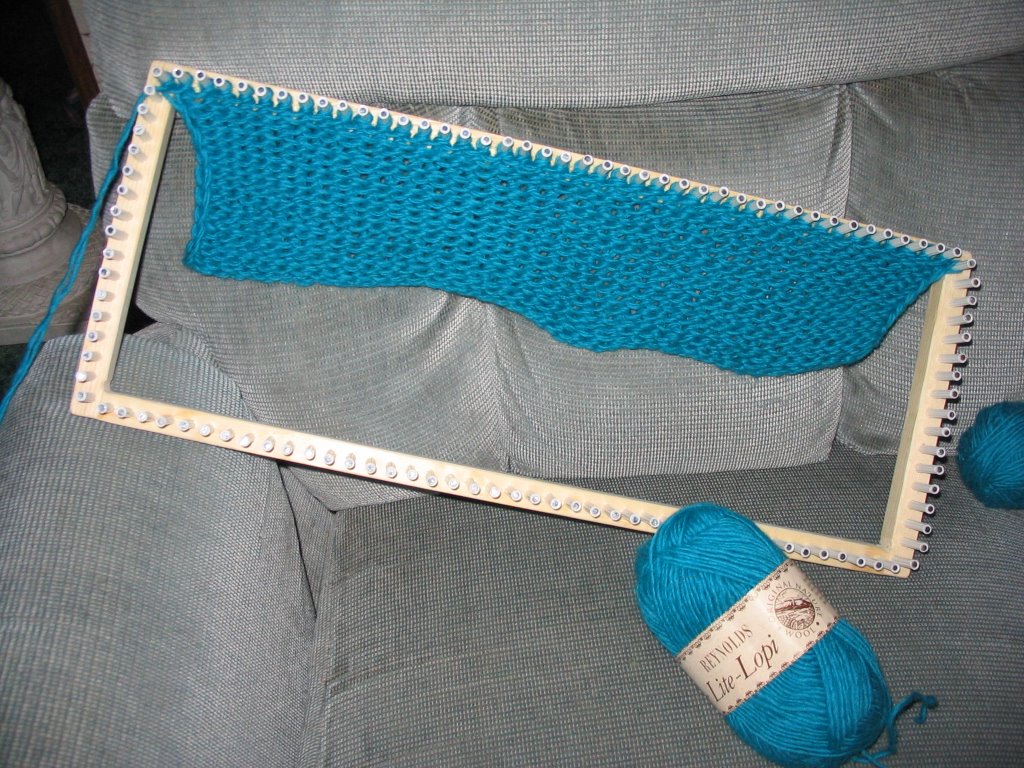
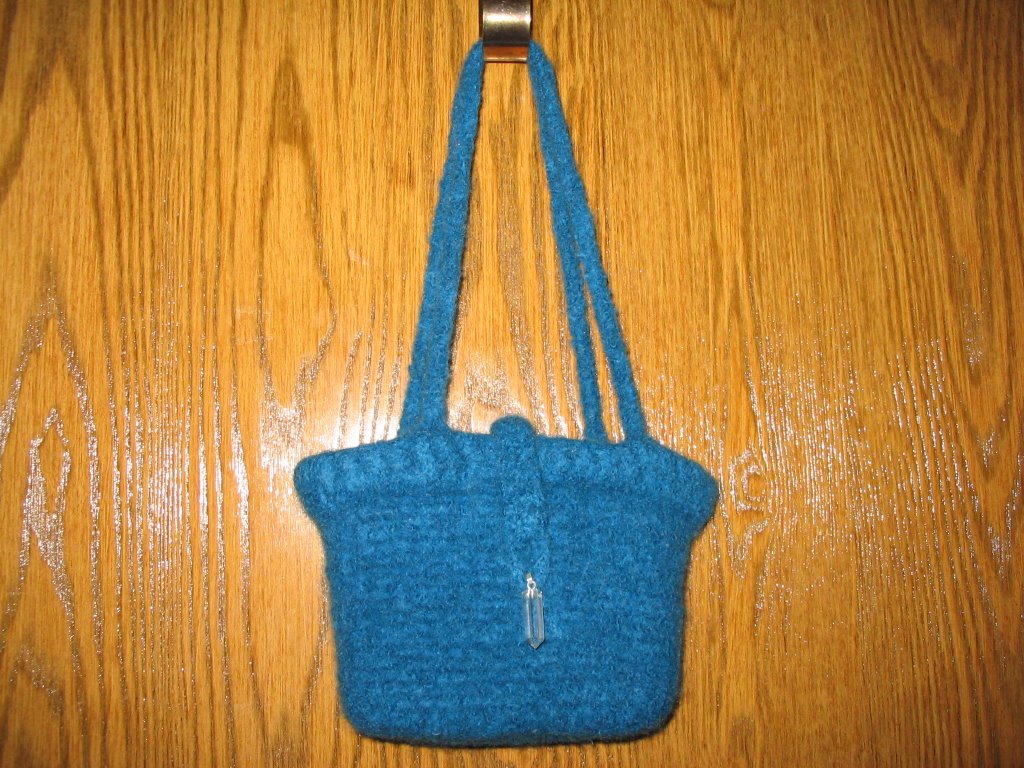
I finished the big tote last night! And, it IS BIG! It measures 15" tall with a base of 18" by 6". Just to give you an idea, there are two 22" square pillows inside of it! One is in front of the other.

I used 6 skeins of Lite Lopi 100%- two strands held together throughout. (And I used it right to the last inch -no exaggeration!) This yarn is not as sturdy as the other wools that I have tried. If you pull too hard, it will break! The texture is not as smooth as others either.

Of course, I plan to felt this bag so we shall see how it looks and feels once it's felted. I also plan to make a bag on the Yellow KK with the Lite Lopi to continue the wool study! I'll have a real reference then!

This was made with my flat bottom bag method too!


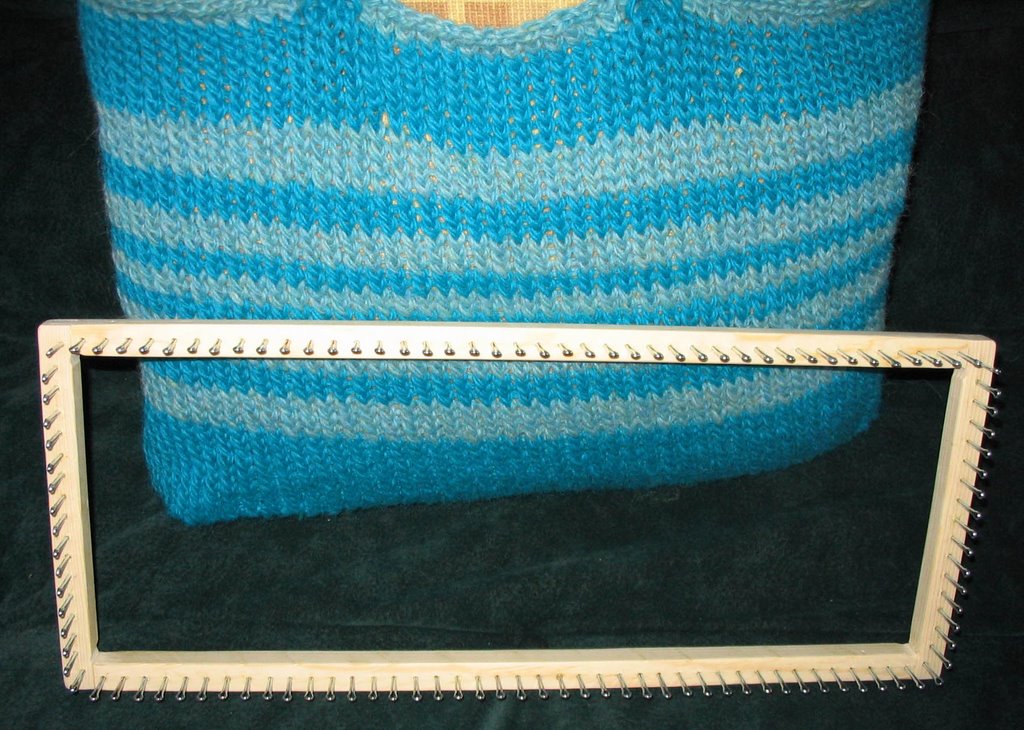
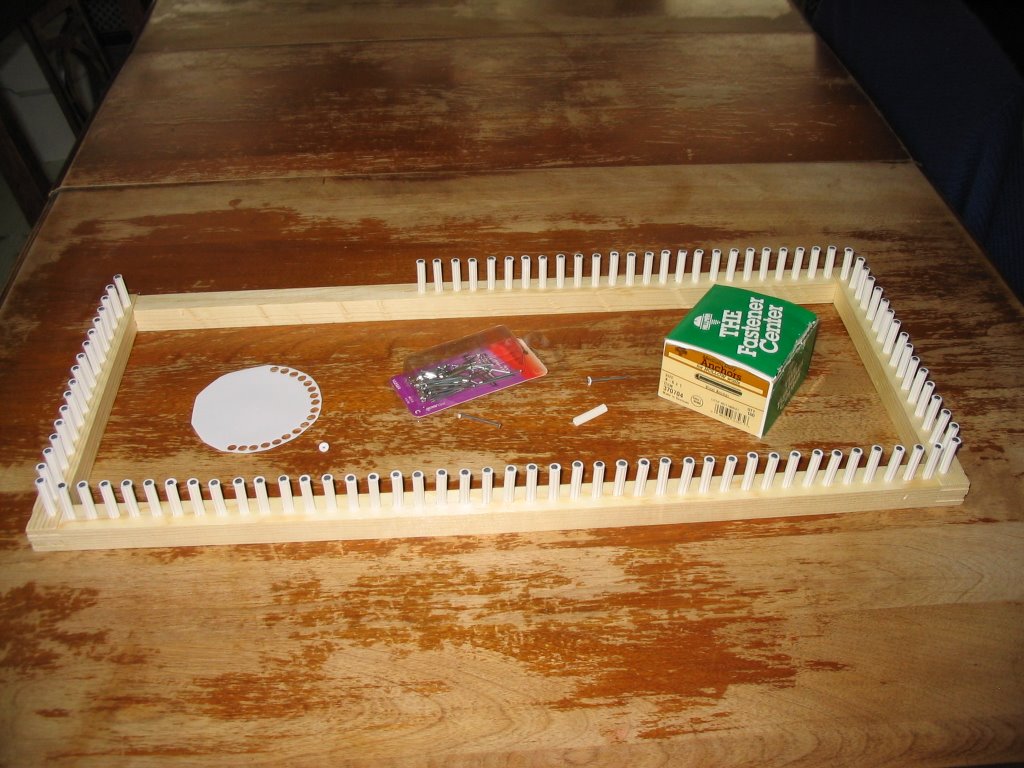
On to the Loom! My pegs didn't work out as well as I had hoped. The plastic anchors I used were grooved - and that was great to get the hook into, but the little hole punched plastic pieces didn't cover the tops completely. I tried to sand down the tops of a little so the sharp edges weren't so rough- but that just didn't seem good enough. I had to be really careful not to rub my hands against the tops of the pegs so I wouldn't scratch my hands. Sometimes, the yarn caught a little bit too. Also, the nails were a little too short for the anchors so they didn't go very far into the wood. Some of them came loose. Some were very tight though!
So... as soon as the bag was off the loom, I pulled the pegs out and took the frame out to the yard. I sanded all the glue off and got out my handy dandy Dremel and Plunge router attachment and made holes for cotter pins.

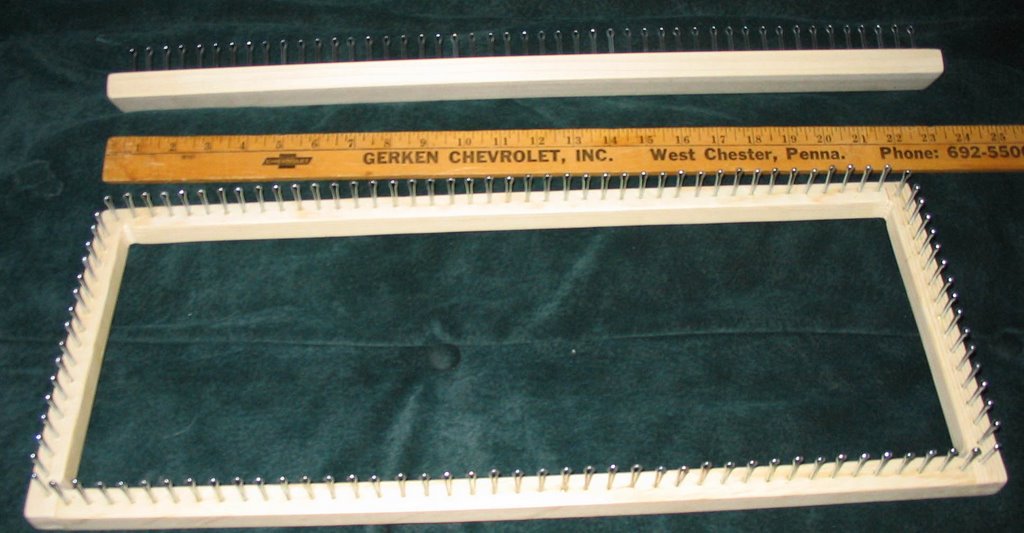
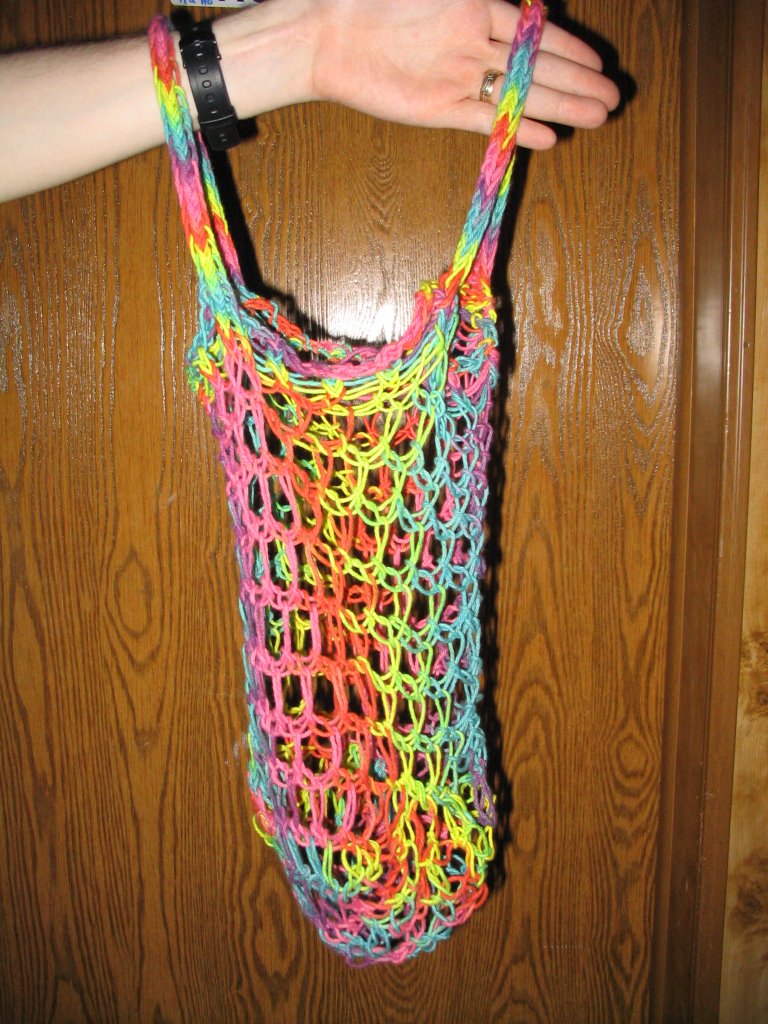
I made a rake knitter the other day using the same method... here it is...

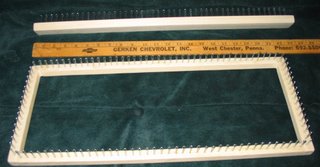
Both of the looms have a 1/2" spacing on center for the cotter pins. I like them much better! I used Elmer's Polyurethane Glue to hold the pegs in... and let me tell you, I don't think they will ever come out!

So... the many projects in my head are really ready to come out! Unfortunately, my friends - The Sew Fine Quilters expect me to have 35 quilt kits ready for them by this Sunday! So, I just have to finish making the quilt kits before I can do much in the way of looming! Of course, there is always time to felt a bag!
Hmmm... I think I will do that now! Talk to you later!

PS. You can always click on my photos to make them bigger... You might even get a magnifying glass icon to make them even bigger! - No looking for spots on the couch! :o)
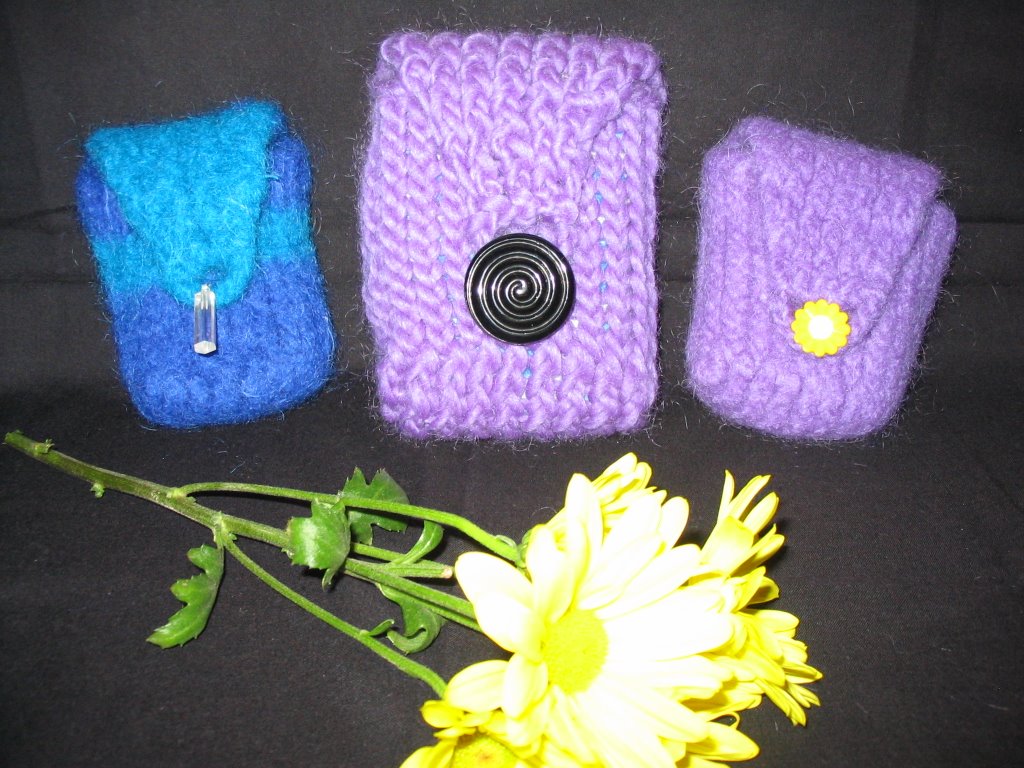
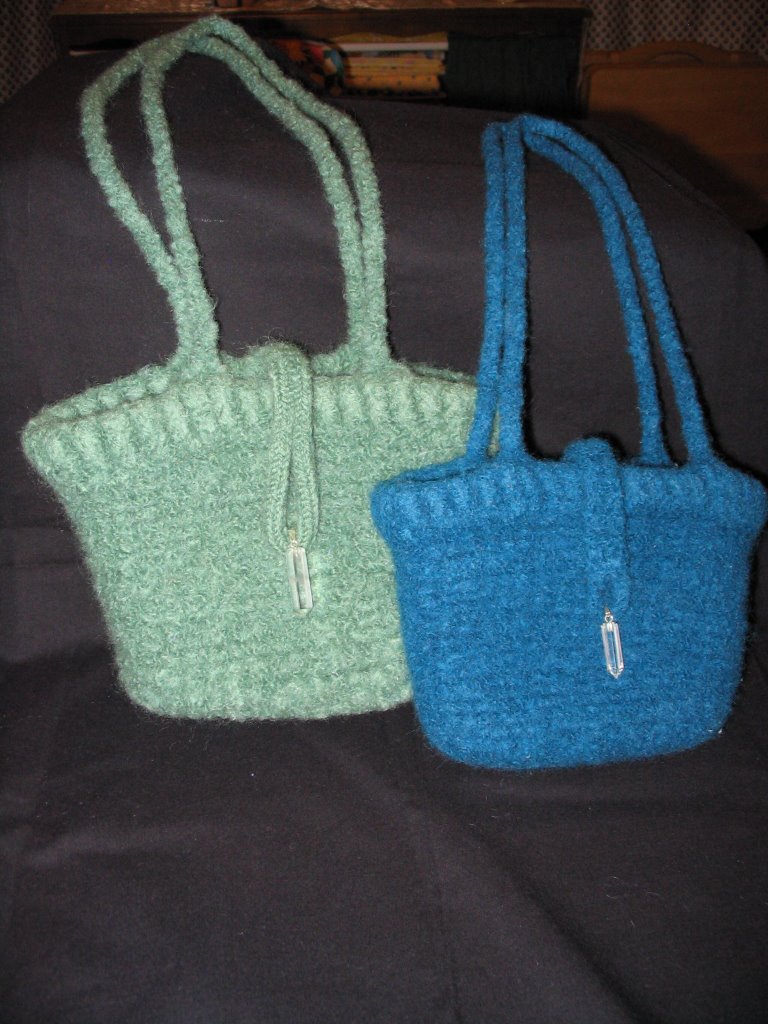
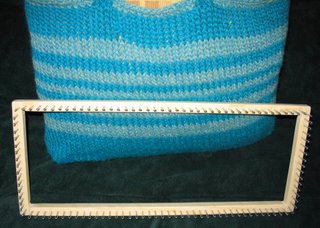
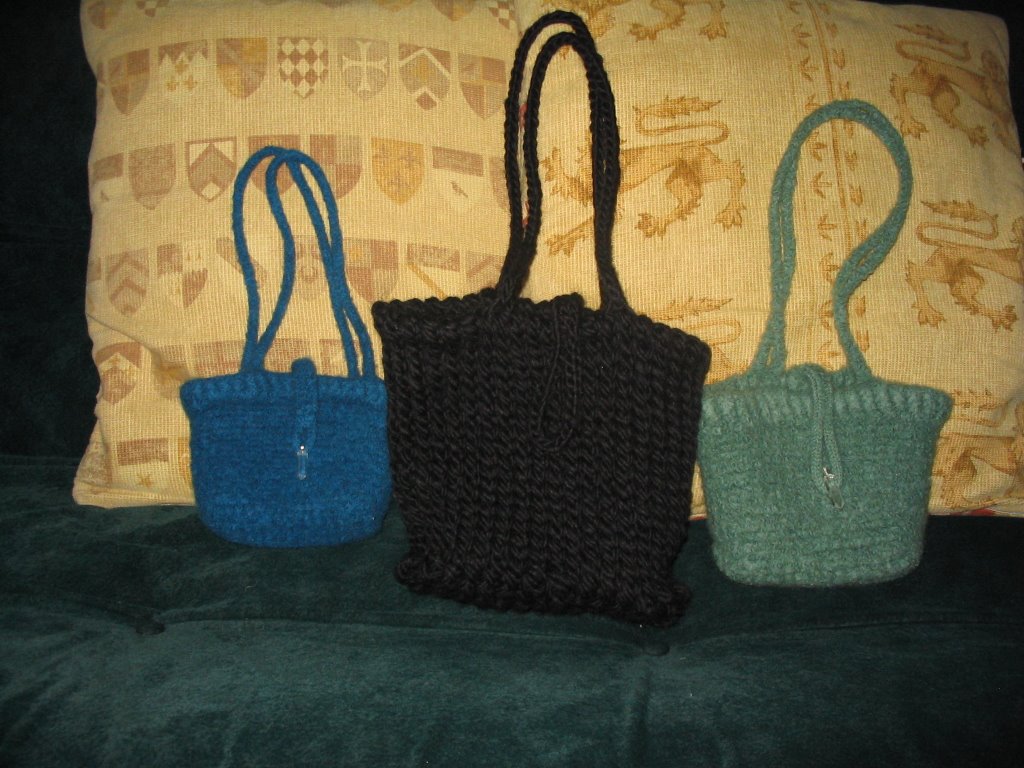
Saturday, March 25, 2006

Checking in!

This is just going to be a quick non-visual post... I'm working hard on some things. The bag I'm working on with my new loom is coming out nicely! I'm hoping that with 116 pegs, it's big enough to hold a lot of things after felting! On that note... I definitely am going back to the drawing board with that loom. The pegs aren't as good as I thought they would be... some are perfectly fine... some are coming loose - plus they are a little scratchy in some parts. They are only in the wood less than 1/4" - I've made a rake loom with cotter pins that that bad boy is sturdy! I'm probably going to change the rectangular loom out to cotter pins... as soon as I get enough cotter pins (been traveling to all the hardware stores in the area to gather enough!). And, of course, I have to finish the bag too!

I'm also working on a pattern for the bags made on the Yellow KK looms... the felted ones--- and some non-felted ones!
Up and coming is a v-neck knitted tank top pattern! Just in time for summer!
Happy Looming!
~Crystal

Tuesday, March 21, 2006

All Dressed Up and Ready to go!

When I told these little ones that they were going on a trip to far off lands, they started jumping into the box! I told them to come back out so I could take a going away picture… Can you see them waving?

These precious fibers are off on their yarn swap journey… they’re hoping to find someone who appreciates them for who and what they are.

Whether functional, funky, fun or fanciful, they all hope to be transformed and loved!

So, off they were sent to the first person on our Yarn Swap List--- No peeking Darlene!

I could hear them giggling as the mail lady put them on the conveyer belt down the shoot at the post office! You would have thought they were on a sliding board!

Farewell sweet ones--- have fun in your new home and don’t forget to tell your new fiber friends how much fun traveling is! Send some of them my way, I’ll give them good homes, as you know!

If you are wondering what this is all about… The Knifty Knitter Looms Yahoo group is having a yarn swap… I’m the box coordinator for Box #4--- and this is the starter box! Let’s see if any of these darlings come back after going through 9 people!

Friday, March 17, 2006

It Works!!!

Here's the scoop! As you can see from my pic... The loom is working! I'm using two strands of Lite-Lopi wool yarn. One strand wasn't enough- this yarn is kinda thin. Can you guess what I'm making?
I have to say that there is some tweeking needed with the loom... little more glue here and there, but for the most part, it's working well. The frame is sturdy. The nails used in the pegs could be a little longer... they aren't causing any problems now and I'm hoping it stays that way. For my first loom, I'm pretty happy with it.
OK, I'll tell you... I'm making a bag- maybe big enough to be a tote bag once it's felted!!

Wednesday, March 15, 2006

Flat Bottom Bag- After Felting

Much awaited... after felting comparison of the original Flat Bottom Bag! The center purple bag is the same as my first blog posting... the other purple one shows the after felting size. The blue one is also the same size. If you recall, these bags were made with Lamb's Pride Bulky. I like that this yarn doesn't shrink so much. But, I think there is a combination of things happening here... The yarn is bulky weight--- heavier than the others I have tried so far... also, the blue loom is a slightly finer gauge than the yellow loom... so the knit is tighter.
Just my thoughts.. The daisies really aren't that big... it's all in the perspective.
Sizes...
Pre-felted- 4 1/2" high, base 2"x 3 1/2"
Felted - 4" high, base 1 1/2" x 3"

More Felting Lessons for Me!

In the first picture, you can see the little blue bag made previously and it's standing as a comparision to the green bag. The green bag was made out of Lion Wool (not Wool-Ease). This is worsted weight yarn, and very soft to work with.. and nicely woven. I used 3 strands on the Yellow Knifty Knitter and made it with the flat bottom bag method. The same way as the blue one was made. This is the size the blue one was before felting (there's your comparison). I made the handles with one strand on the Wonder Knitter (3 pegs). The button hole strap was made on the Embellish Knit - which made a much smaller/tighter knit. I held the ends together long ways and stitched most of the way up leaving some open as the button hole.


Now, The After-Felting comparison! The green bag measures 6 1/2" high with a base of 3 1/4" x6". This is a better size for me... and with green... it's just in time for 'Green Day' as my 3 y/o calls it!
These are both done using the same pattern... 18 pegs to start and flat panel bag method. The differences...

Green Bag: 3 strands of Lion Wool - took 2 skeins
Blue Bag: 2 strands of Patons Classic Wool- took 1 skein.


Note to self... be more scientific... use the same amount of strands to really see a true comparison! :-) (in my defense... I wanted a bigger bag!)

I Can't Wait to Try My New Loom!


I was inspired yesterday!!! After I felted another bag made on the Yellow Knifty Knitter Loom, I thought it was a little small. I have heard that the larger the gauge of knitting, the more it shrinks. So, I wanted a loom in a smaller gauge to try out some more felting. I knew I just couldn't wait if I ordered one online... so a-hunting for supplies I went.
First stop was Michaels to see if they had any canvas stretcher frame used by painters. I couldn't believe it - They only have prestretched canvas and frames. Now, I've never painted on canvas, but I have done some things with those frames--- and they used to sell the pieces seperately... not now. OK... so I continued searching... I found in the embroidery section some framing pieces that come in sizes from 9" to 22" (two in a package)- they are about 3/4" square. So, I bought the 22" and the 9"sizes. (Total cost after 40% off coupon- under $4.50). Then, to find some pegs... well... Michael's was a bust for that. The wooden pegs were too big, and they had no cotter pins (wasn't really expecting them) If I was going to put all this work into a loom, I didn't want to just use nails. Anyway... off to the local Ace Hardware - and I searched and searched. They had cotter pins.. but only about 40 of them- I needed 100 of them (I tought). So, I looked through all the bins and boxes to see what I could find. I found these straight wall anchors ($.03 each)they have grooves in them that I thought would be perfect for the loom pick to glide along... and some nails... So, my total cost there... Under $5.
I put the frame together and glued it... then, with a push pin I poked the holes 1/2" on center. I put the wall anchors through the nails (with some glue on them) and mounted them on the board... but I realized that the grooves on the wall anchors stuck out a little bit and I feared the edges would catch the yarn... so I needed another solution.
After some thought, I figured out a solution... a washer... but I had none- and it was 10 o'clock at night... and my glue was already drying! So, I punched holes into an old margarine lid with a regular 1/4" hole punch- pushed the nails through the middle and it covers the edge! Hopefully, this will prevent the pointed edges of the grooves from catching the yarn! Well... of course I had to take all 100 nails out and add the makeshift washers to the pegs. Long before this, I realized I had 116 holes--- so I was short 16 pegs.
This morning, I went back to Ace and got what I needed to make the rest of the pegs. When I came back from work, I sanded the wood down - rounding the edges and smoothing the joins and added the rest of pegs. Now, it's drying... and I'm anxious... I can't wait to try out my new loom... I've got some Lopi wool that is dying to be made into a handbag!!!
Wish me luck that it works well and holds up!

Saturday, March 11, 2006

Oh Boy did it shrink!


Oh how I wish I had taken a picture of this bag before I felted it! This bag was made on the Yellow Knifty Knitter Loom with Paton's Classic Wool Merino in Peacock. This yarn is very soft and pretty good to work with. I used two strands held together throughout in the e-wrap stitch. After felting the bag stands 5" high and the base is 2 1/2" by 5 1/4". This is less than half the original size. Before this, I have only felted with Lamb's Pride Bulky... so it was definitely an experiment. The Lamb's pride never shrunk this much.
At first check from the washer (about 5 minutes into agitation) the bag looked very lacy- the bars of yarn between stitches had big spaces in them. I rinsed with cold water and tossed it back into the washer. My little one was in the bathtub while felting, so I had to wash her hair and such. Once we got her finished, the washer was already on the spin cycle. So, I let it go through the rinse cycle. The bag is very sturdy and thick. On the bright side, it'll probably keep it's shape very well once completely dry. But, I was hoping for a thinner, lighter weight bag for summertime. (and one that is a little bit bigger!). So goes the learning process of a new craft!
This is a larger version of the flat bottom bag (see first post of this blog). Here are the specifics...
I e-wrapped 18 pegs in flat panel method until it stretched to the opposite side of the loom. I hooked 17 pegs on the opposite side of the loom (using the 'bars' created between the stitches). There were 3 pegs on either side empty- I hooked them with loops from the sides of the piece. Then, I knitted in the round until it was as long as I wanted, probably about 10" high. I added the handles (stay tuned for info on how I attach handles - plans for another blog in the future). Then, I knit about 4-5 more rows and bound it off with the crochet method. I folded the piece inward so that the handles were at the very top and whip stitched the top edge down--- creating a 'cuff'. The button hole/strap was made by double crocheting with a single strand of the yarn. 3 stitches across and about 8 inches long. A loop was made by crocheting a chain and attaching it to the other side. When it was done felting, I stitched a crystal pendant onto the bag as a button (but this is much easier!). This is kinda my trademark... I put a quartz crystal pendant on every handbag that I make. I used to make and sell fabric handbags. I guess that's why I'm drawn to make bags with my looms!

Oh- by the way, I made that mesh laundry bag... it's nice and big--- ready for any felting project I can toss into it! It worked great!
Happy Knitting!

Felting Lesson Learned


Some people call it fulling...I still call it felting. The act of putting a wool item in a hot water wash and making it shrink up. Then, rinse in cold water and do it again (if necessary) until you get the desired results! Since I had two of these bags to felt and only one very small mesh laundry bag, I put one in it and left the other one free in the washer. Here they are drying... Can you guess which is which?
OK, I'll tell ya! The blue one was left free in the washer with the blue jeans. Can you see how much more fuzzy it it? It needs a haircut! The purple one was done in the mesh bag. I definitely like the look of the purple one better! I did notice that the stitches are almost invisible on the blue bag, and the purple one you can see some striping where the stitches are! Very interesting study in Felting (ok, Fulling!). By the way, both bags were made with the Brown Sheep Bulky 100% wool yarn using the flat bottom bag pattern (my first blog entry). When they are dry and the buttons are added, I will take another picture of them with the 'un-felted' one. I have to make a big laundry bag to felt any bigger bags I make! Hmmm, imagine that, I happen to have some fine meshy fabric lying around here somewhere.... I'll add that to the project list!

Friday, March 10, 2006

More Bags!!!

Mesh Bag

I got the idea for this bag pattern from Suzanne's Duster stitch (go to Jan. 06 archives to see it). This stitch is the mock crochet stitch done by skipping every other peg. I made the bag with 100% cotton Peaches and Cream yarn in the Fiesta Ombre color. I used the flat bottom method from my first blog entry pattern and I made the straps with 3 stitches on the loom flat panel method. The first picture shows the bag holding a large bath towel... there's a little room to spare. My idea was that this would make a good shopping bag for the produce store, or for a beach bag. Now, the ideas are flowing into other things with this stitch... my husband thought it looked like a basketball net, I'm thinking stuffed animal hammock for my daughter's room and maybe even a bath toy bag!
The first time I tried this stitch, I made the piece twice as long as I should have so I had to frog the whole thing and start over... but I really didn't mind... it's a fun stitch to make and it goes really fast!


Bunny Bag

This Bunny Bag was done with the pattern on the Provo Craft website but I did the bottom with the flat bottom method (I can never stick to a pattern completely!). It was made with Red Heart Baby Clouds yarn and the bigger pom poms were made with Caron Simply Soft and the small one was made with Lopi wool yarn.


Felted Bag

This felted bag was made on the Yellow Knifty Knitter Loom out of Brown Sheep Bulky yarn. I used the backpack pattern on the Provo Craft Website for the body of the bag (well for the most part). I did it with the woven bottom of the bag- I find that to be a waste when felting, it's very bulky on the bottom and didn't felt the same as the rest of the bag. It doesn't look bad, but just seemed that in this case, it's a waste of yarn. Well, it's a very long, skinny and round bag. Sometimes, I just start knitting and don't know when to stop, I guess! If I make another one of these, I would stop sooner and do the bottom with a flat bottom method! This was the first bag I made on the Knifty Knitters... and I have to admit, I'm not lovin' it - but we learn from our mistakes.

Hmm... I have some feltable wool yarns in the knitting basket and they are calling my name! Let's see what other bags I can make!